Tuesday, December 25, 2012

On the twelfth day of Christmas...

Merry Christmas Everyone!!!!!

It's finally arrived and although mine was short (I had to work on both days) it was lovely and I did get to spend some time with my family having a wonderful Christmas with a lot of good food and company.

Once again I had a very intense week with work and all my baking It felt like I was doing two shifts a day! But I don't mind being tired if it means I get to bake and spread my goodies for others to enjoy.

This year I made a lot of gifts and I loved it! all were made with the person who was receiving them in mind... giving them a special touch.

One of my favourite things to make was chocolate bark. So easy and simple, yet so delicious!

Here are some of my chocolates.


On the eleventh day of Christmas...

Christmas is near and one of my favourite Christmas traditions is the Advent Calender... of course the chocolate ones:P And although I am a young adult I still get one every year.

source: http://boards.weddingbee.com/topic/chocolate-advent-calendar

Next year I will be making my own chocolatey Advent Calender :) 

Saturday, December 22, 2012

on the tenth day of Christmas...

Do you have leftover cake trimmings and you don't know what to do with it?

Well I have an idea for it!

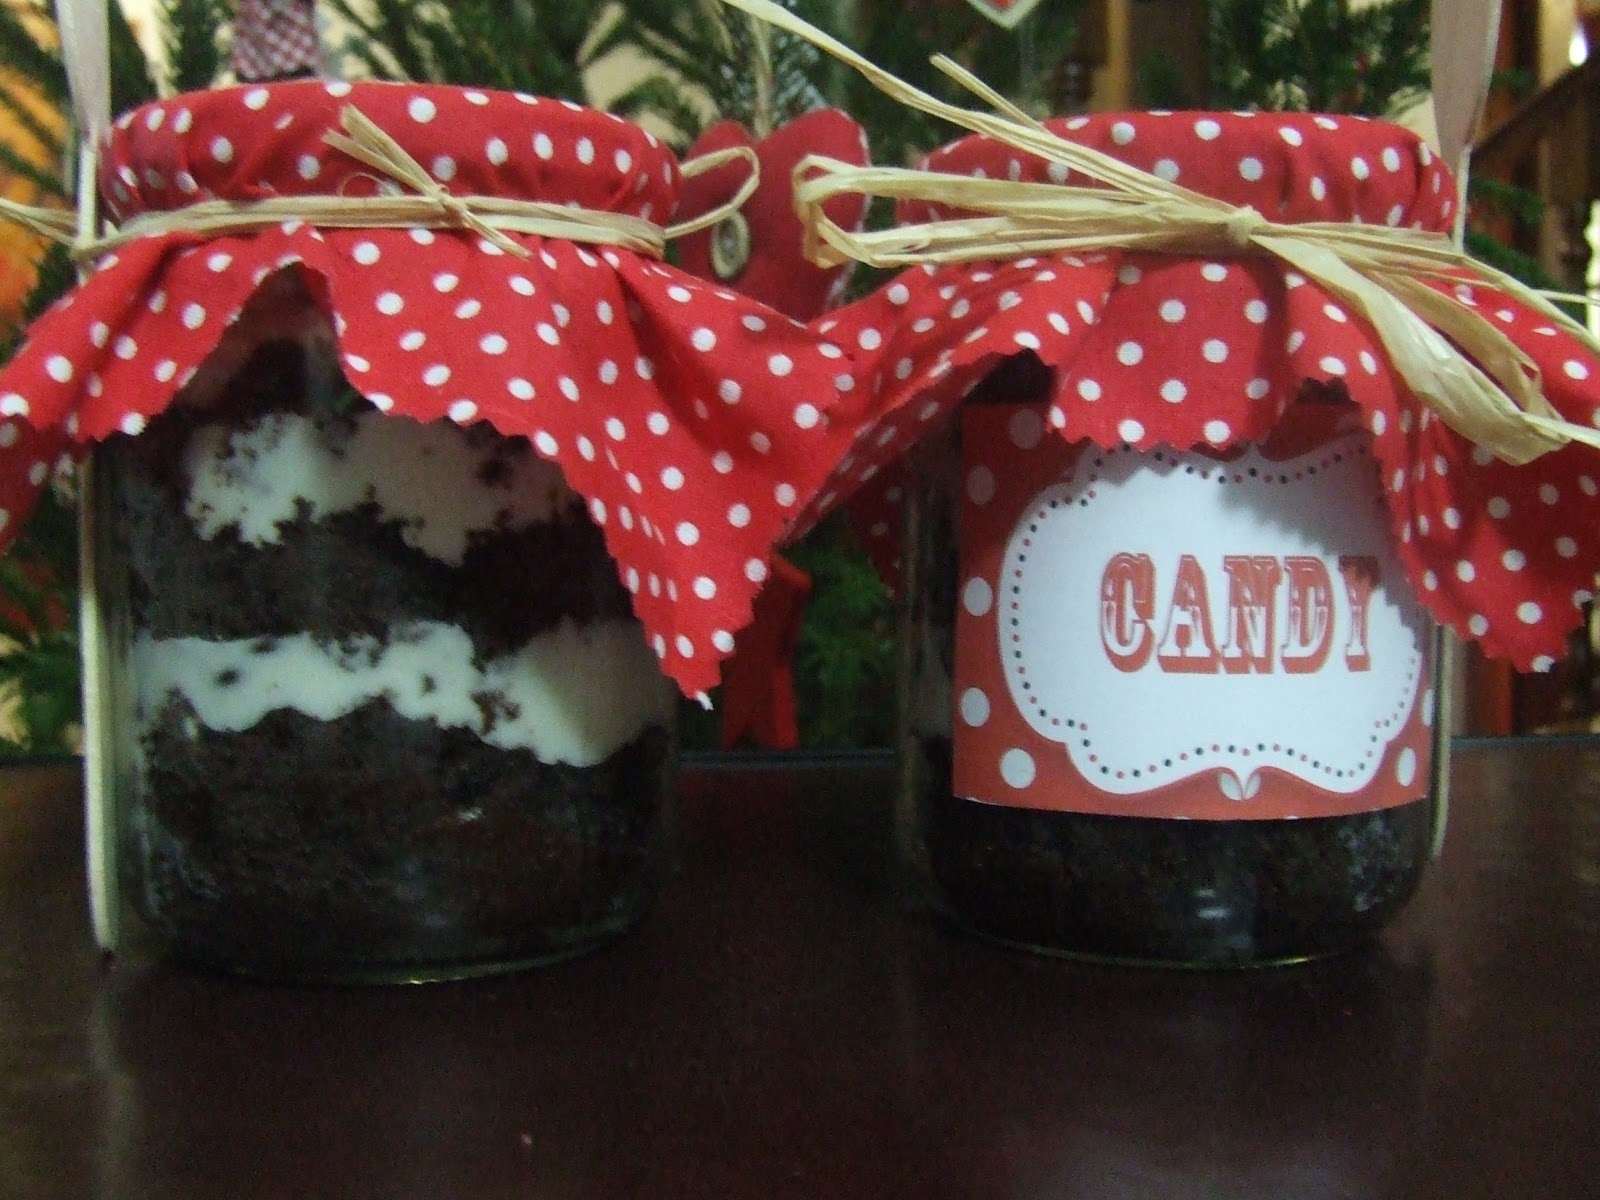
What's better than receiving a cake in a jar?! it's so delicious and one of those perfect comfy food for those bad days. I layered chocolate cake trimmings with cream cheese frosting, condensed milk, chocolate chips, marshmallows and melted chocolate (I know calorie bomb!). But you can do all different combinations. The final effect is gorgeous and you do have fun making them.


I made this for some of my friends' xmas presents and I have been told that it does indeed taste yummy!


Friday, December 21, 2012

On the ninth day of Christmas...

What is there more festive than peppermint Candy Canes?!

So today  my suggestion is... Peppermint Candy Cane chocolate bark!

I saw a video for this idea about a year ago and decided to give it a go. Unfortunately for some reason, in Portugal I can no longer find peppermint Candy Canes (only weird fruit ones... definitely not the same) . So this year my good Friend Grace was an absolute star and sent me some!

I recommend you give it a try. It's very delicious! Here is how you make it:

This isn't the original video I saw for it but I can't find it!

Give it a try and have fun!

Thursday, December 20, 2012

On the eighth day of Christmas....

It has been a crazy week. Between work, cake orders, xmas presents and dinners I am still amazed I am managing to post on my page this much!

Yesterday I got the chance to give some xmas presents and oh boy I was excited! Yes... I am one of those geeks that makes something and loves it more than the person who is receiving it. Well i did put a lot of love and thought into my gifts ;) The best part of making them is knowing they will be appreciated.

On to the fun part... I made cookie mix in a jar! I found the idea online when searching for images of edible goods in a jar.


Those cake mixes you find in the supermarket have always bothered me because they are so artificial and in the end don't really taste like nice homemade cake. But it is true that a lot of people do not possess the time, the patience or the passion for baking and when looking for something nice and easy to make they use pre- packed cake mix.

So to me this gift idea makes sense as it works just like a pre- packed cake mix but it's all natural, additive free ingredients, and the final effect is amazing! I like to think of it as gourmet cake mix.

For these jars I made two different cookie mixes, Santa's cookies and triple chocolate cookies. I found the first one on www.tipjunkie.com (http://www.tipjunkie.com/homemade-gifts/48-homemade-gifts-in-a-jar-2/), which then reverts back to the original recipe (Bakerella). For the second one I searched for a while until I found  a whole page dedicated to cakes and cookies in jars. (http://www.mixesinajar.com/mixes/cakes/)

You can also just use your home recipes to fill up the jars, however these pages give you the exact quantity for the jar. Which will save you a lot of time when putting this wonderful gift together.
For the labels you can find quite a few online and most recipes will come with a template for you to print. I made mine from scratch (using powerpoint) and glued them onto the jar with UHU power stic.

Also don't forget to sterilise all of your jars before packing in the ingredients.

I hope you enjoy these amazing gift ideas as much as I have!

Keep Baking x

Wednesday, December 19, 2012

On the seventh day of Christmas...

I saw this video and thought you might like it...

How cute are these mini gingerbread houses? they would look awesome on a cupcake!

Unfortunately because of all the xmas orders I have I won't have time to try these adorable houses out!

But I do recommend you give these very talented baker's creations a try.


Bake away!

Tuesday, December 18, 2012

On the sixth day of Christmas...

When I think of Christmas there one thing that always springs into my mind... Mince pies!

Even though I am not a fan, I know they are a big English Christmas Staple and are devoured by many (including my cousin and mum).

Traditionally made with mincemeat (reason why they are called mince pies), they are an evolution of a medieval pie that contained meat, dried fruit and boiled eggs. (http://www.englishteastore.com/history-mince-pie.html)

These small pies go wonderfully well with custard... oh so very British ;)

Do give it a try!

Ingredients

  • 350g/12oz high quality mincemeat, preferably homemade
  • 200g/7oz plain flour, sifted
  • 40g/1½oz golden caster sugar
  • 75g/2¾oz ground almonds
  • 125g/4½oz unsalted butter, diced
  • 1 large free-range egg, beaten
  • milk, to glaze

    Preparation method

    1. Lightly butter a 12-hole pie or patty tin. Tip the mincemeat into a bowl and stir so that the liquid is evenly distributed.
    2. Place the flour, sugar, almonds and butter in a food processor and process briefly until resembling breadcrumbs, then slowly add the egg through the feeder tube. (Or rub the butter into the dry ingredients by hand and stir in the egg.)
    3. Bring the mixture together with your hands, wrap in clingfilm and chill for an hour or so. Thinly roll out the pastry on a floured surface. Cut out 12 circles with a fluted pastry cutter, large enough to fill the base of the prepared tin. Press gently into each hole, then fill with the mincemeat.
    4. Cut out another 12 slightly smaller discs and use to cover the mincemeat. Press the edges together to seal. Make a small slit in the top of each, then brush lightly with milk. Chill for about 30 minutes. Meanwhile, preheat the oven to 200C/400F/Gas 6.
    5. Bake the pies for 20 minutes until golden brown. Remove to a wire rack and serve warm.


source: http://www.bbc.co.uk/food/recipes/mincepies_73207